Friday, April 28, 2017

Friday Focus - Idea-ology

It's Zoe Hillman's turn to share a brand new Friday Focus with you today. This is our opportunity to share with you ideas, tips and techniques for using a specific product or range currently available at The Funkie Junkie Boutique. And even better news, those products then have an extra 15% discount added through the coming two weeks! In the spotlight this time is the Tim Holtz Idea-ology range.

Zoe loves using items from the Idea-ology range in her projects as focal points, embellishments and even to create backgrounds. Here are a selection of some of her projects;


The plane from the Adornments Souvenir set just needed a touch of paint to enhance it before taking centre stage on her layered postcard.


This little vignette house was transformed into a floral masterpiece with some Bouquet Findings, coloured with Distress Sprays.


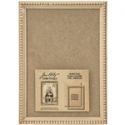
Tim Holtz' new Idea-ology Paper Dolls have been a huge hit since their launch in January and you can see why - they reside beautifully in this house perched on Letterpress Blocks. A Decorative Dome sits perfectly on a Finial (from the mixed set).


The addition of Mushroom alcohol ink to this Adornments Index Clip gave it an aged look to fit with the layers of Distress Inked card below. And the little window in the clip allowed Zoe to add some Rub On numbers as a clever detail.


Sometimes you simply need to use a portion of an embellishment to finish a project; removing the prongs from the fork in the Adornments Silverware set made it just the right height for the bottom of this card.


Lining up a number of Mini Gears can make more of a statement on a project, particularly when using all of the colours which come in the set. And for even more impact use a Game Spinner on top of one of them, attaching it with a Hex Fastener.


The Idea-ology range also includes items which can be used to create backgrounds; collage together an assortment of elements from the Ephemera packs for a beautiful vintage quilt. Adding Collage Mediums and Distress Crayons over the top blend them together seamlessly. Then add a little globe from back where we started with the Adornments Souvenir set, painted to highlight the detailed features.


By now you should see why Zoe is such a huge fan of the Idea-ology range for creating and completing her gorgeous projects. Remember, for the next two weeks there is an additional 15% discount on them so now is definitely a great time to stock up on your supplies.

Thursday, April 27, 2017

Guest Designer - Donna Billek

Please say hello again to Donna Billek, who is our the Guest Designer for the Put Your Inking Cap On challenge.  Donna's blog is Inkysplatters and she was the Top Pick from the You've Got to Know When to Fold Em challenge.


Hello! I am so pleased to be joining the current challenge, Put Your Inking Cap On, for the Frilly & Funkie Challenge Blog as a guest designer! It is such an honor to be asked to submit a guest designer project so thank you to the Frilly and Funkie Design Team. Thank you also goes to Linda who graciously supports the challenge blog and to all of you who submit projects for the challenges. I am always amazed at the talent and types of projects submitted!

As many of you may know, I live in the beautiful state of Colorado with my beloved and our four-legged furry family. While I’m still pretty new to mixed media, I enjoy learning new techniques or trying out new products every time I’m working on a project. There’s nothing like forcing yourself to work outside your comfort zone and this current project was no different!


This challenge is great fun as we can’t use any pre-patterned papers and, if you are anything like me, it was definitely a challenge! So, out came the stencils, inks, paints, flowers, tissue wrap, archival ink, and stamps! I decided on a cream, purple, and brown set of colors which, to be honest, is not a normal set of colors for me. I started off by creating my background for the canvas using plain Idea-ology tissue wrap, a stamp, and archival ink.

* * *
Donna has definitely risen to the challenge with this lovely canvas.  How fun that purple seems to be the go-to colour for this challenge.  If you want to see more details of her creation and how she created without patterned paper, just click here to be taken to her blog. When you are finished come on back and share your inky creation with us. You have lots of time because the challenge, which can be found here, runs until Tuesday, May 9th at 11:55 pm EST.

Saturday, April 22, 2017

Saturday Step x Step - Mother's Day Project

Double click image to see details
Hi everyone,

It's Linda, the Funkie Junkie, here this week to share a sweet Mother's Day frame. This was such a fun project to make!  I wanted to make it very girly and retro so I set out to make a chintz fabric type of background using a Wendy Vecchi Stamp It, Stencil It image.  And don't forget, you can double click any image to get a great close up.

Step 1. The finished background piece is to be matted on a Tim Holtz Idea-ology Framed Panel. Cut a piece of Ranger Specialty Stamping Paper 6¼ x 8½ inches to fit the frame. 

Zoom in close by double clicking.
Step 2. Create a multi colored background by misting the Specialty Stamping Paper with rubbing alcohol and then dripping a few drops of Wendy Vecchi Leaf Green Archival ink from a reinker onto the surface. Spread the ink around the surface with a palette knife. Dry with a heat tool and watch the magic happen.

For this project, you don’t want to get your background too deeply colored. It should be kept fairly light so the stamping will take center stage.

To create a second layer, once dry, spray again with rubbing alcohol, drip on a few drips of Pink Peony Archival Ink and distribute with a tool. Heat this layer with a heat tool and your background will be finished.

Check out the details with a double click. 
Step 3. Stamp the floral stamp From Wendy's Bouquet Stamp It Stencil It using Jet Black Archival Ink in a random pattern. Be sure to heat set your archival ink before going on to the next step. Archival Ink takes a few minutes to dry on Specialty Stamping Paper. It’s best to heat set it to avoid smearing. It’s also important to note here that the background (Step 2 above) using the rubbing alcohol must be done before stamping with archival ink. If you stamp first, the alcohol will remove the archival ink stamping.

Add an extra pattern to the background. Use Leaf Green Archival Ink to stencil the Fern stencil using the Mini Ink Blending Tool. Heat set your stenciling.

Zoom in for details by double clicking.
Step 4. Using the stencil that came with the Bouquet Stamp It Stencil It, stencil on Leaf Green Archival Ink using a Mini Ink Blending Tool. Each time a leaf is stenciled, apply Ranger Clear Embossing Powder over the wet archival ink and heat on. Repeat process with the flowers, stenciling them with Pink Peony Archival Ink and then clear embossing. Archival ink works great as embossing ink and embossing gives your project a little extra boost of texture and dimension. Embellish the flower centers with Wendy Vecchi Sunflower Enamel Accents.

Check out the details close up with a double click.
Step 5. Using the Wendy Vecchi Checkerboard stencil, stencil Pink Peony archival ink onto white card stock with the Mini Ink Blending tool. Remove stencil and wipe off excess ink, reposition one square over so the white squares show.  Stencil on Leaf Green Archival Ink to create a checkerboard of pink and green. This will be the background for your letters.

Step 6. Die cut 3/4” letters for Happy Mother’s Day. For this project, the Tim Holtz Decorative Strip Die Chip Block was used. Apply Tim Holtz Distress Embossing Ink to the letters by pushing the letters face down into the pad. Apply Wendy Vecchi Violet Embossing Powder to each letter and heat emboss.

Affix letters to strips of the checkerboard paper to spell out Happy Mother’s Day. Embellish strips with Leaf Green Enamel Accents. Reinforce sentiment strips by adhering a piece of chipboard to the reverse side. Use Ranger Black Foam Adhesive to mount and to add dimension.

Zoom in by double clicking.  
Step 7. Give the frame a distressed look by painting it black with Tim Holtz Black Soot Distress Paint. When dry, paint on Distress Embossing Ink with a paint brush and emboss with Wendy Vecchi Violet Embossing Power. Apply to one side of the frame. Tap off and return the excess powder to the jar. To give it a distressed look, lightly rub off some of the embossing powder so some black shows through. Discard embossing powder that was rubbed off. Don’t mix it with the good embossing powder as it may be clumped from being exposed to the embossing ink. Heat emboss each side and let cool before going on to the next side of the frame. Repeat this process with the sides of the frame base to which the card stock will be applied. You want a uniform color between the frame and the sides of the base.

Want to see details?  Just double click.
Step 8. Affix the card stock to the base by brushing on a moderate coat of Distress Collage Medium and quickly applying the cardstock. Flatten it down with a clean brayer to make sure there are no air pockets. Run a thin bead of Distress Collage Medium around the back of the frame and affix to the base. Weight it down with heavy objects and let dry.

Zoom in with a double click on image.
Step 9. Handmade florders - stain one sheet of white card stock with Pink Peony reinker and one with Violet reinker. Spray or pour rubbing alcohol onto craft sheet, drip and swirl one color of ink in alcohol and lay cardstock face down into it. Dry and repeat if you want more color. Do the same with the other sheet of card stock using the Violet ink. Cut pink and violet flower layers from stained card stock using the new Tim Holtz Small Tattered Florals die. Scrunch up the layers, flatten back out and assemble layers into flowers. Stain more white card stock with Leaf Green archival ink and cut with Spring Greenery Decorative Strip die. Embellish with Leaf Green Enamel Accents. Affix to frame to embellish.

Thank you so much for stopping by!  I hope you like my Mother's Day project.  All the products used are listed below.  They are available at 20% off list at The Funkie Junkie Boutique.


SaveSave

Wednesday, April 19, 2017

April Showers

Hi there! Suzz here. I am the current host for the Frilly and Funkie challenge which is April Showers. The weather by me is very unpredictable with plenty of wind and rain. The weather had me thinking about showers. For this challenge create a shabby chic or vintage project inspired by the word showers. Think rain, storms, umbrellas, baby showers, wedding showers whatever comes to mind and start creating.

The team will choose their top four picks with the winner being invited to join us in a Guest DT spot here at Frilly and Funkie and the next three will receive badges to display on their blogs. Everyone who enters and follows the rules will be entered into the draw to have the chance to win a $25 spending spree at The Funkie Junkie Boutique.

The guidelines for entering are simple; create a new vintage or shabby chic project following the challenge theme, link it below to your post (not just your blog) and also include a link back to this challenge in your post. You can combine our challenge with up to 10 challenges (including this one) to be in with a chance of winning. If you are entering through a public forum (such as Instagram) you'll need to include the words Frilly and Funkie Challenge. Also, please be sure to turn off your Word Verification so our Design Team can leave comments on your blogs. Make sure you follow these rules as unfortunately we have had to eliminate entrants from the prize draws in the past.

The Funkie side of the Design Team brings us more wonderful inspiration:

Suzanne Czosek - Suzz's Stamping Spot 

Jenny Marples - Pushing The Right Buttons

Linda Coughlin - The Funkie Junkie

**************************************************
WEEK ONE

The Frilly side of the Design Team has kicked us off with some gorgeous inspiration:

Cec Wintonyk - CW Card Creations

Kathy Clement - Kathy by Design


Nancy Dynes - Tattered Treasures

Come join in on the fun and share your showers inspired creation! You have until Tuesday, April 25th to play along in this challenge. Don't forget to come back for a visit tomorrow when our latest Guest Designer will be sharing a new project. And then in one week there will be more inspiration from the Funkie side of the Design Team.

Keep your umbrellas nearby!

Suzz