
"Hi, my name is Nicole" and today I will be hosting your Saturday Step by Step! On today's Step by Step, I'll walk you through the Marbling technique, sandwiching your dies and a little tip with wax paper! I'm heavy on the photos so lets jump in!
For the Marbling Technique I used Distress Paints, Gathered Twigs, Antique Linen, Shabby Shutters and Tattered Rose. You'll need a #8 tag, craft mat and a mister.

Blot all your distress paints in one area. Don't mix them together but they should be close. When you drag your tag you want the paints to "marble" together. So, don't have your paints blotted all over the mat far from each other.

Mist your Distress Paints. This will allow the paint to marble on your tag.

Drag your tag through the distress paint. To fill in the areas that don't have paint simply turn your tag, drag the dry area and repeat. Try not dragging the whole tag again and again. This will muddy the paint.

Here you can see the marbling. If you want a "softer" marble effect then you can mist your tag with water. This allows the paints to blend more.

Heat to dry. If the paint is thick and bubbles a bit while drying use a dry cloth and lightly blot.

What to do with the left over distress paint? There are a couple of things I do. Grab another tag, mist and drag. This is a great way to use product and have a ready made background. Or this is when you ink your ribbon.

I added a little more Distress Paint then mist more water.

Drop your ribbon on the paint and blot it around leaving some white then crinkle into a ball. Set to the side to dry.

Now that the tag is dry distress the edges and ink. When you use an dark ink to ink the edges this draws the eyes in.

Grab your background stamp.

Ink a portion of the stamp.

Then stamp the edges at random. By not using a stamping block you can control the stamping by bending it.

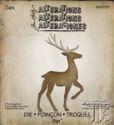
Sandwiching your dies creates a "thick" cut allowing dimension. I used my scraps of Grungeboard and cut just the head of the prancing deer.

I glued each layer. Then trimmed the neck so they were all even. I cut on an angle since the head was being "mounted".

The new Distress Spray Stains are great for these intricate inking situations.

Spray your deer head thoroughly.

The spray gets right between those antlers. Set aside to dry. You can also heat dry.

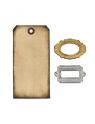
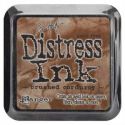
I cut the Mini Shield and inked with Distress Paint Brushed Corduroy.

Once dry add detail with the Layering Stencil Woodgrain and Vintage Photo Distress Ink. I hot glued my Prancing Deer head to the Mini Shield.

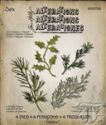
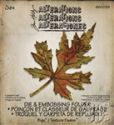
Tip: How about those new Thinlits! Here's a little tip I read about, just in case you hadn't heard. By adding a layer of wax paper between your paper and Holiday Greens Thinlits die this will allow the paper to release easier.

Another tip... run your Thinlits through your die cutting machine a few times back and forth. This really helps those thin dies to get through the paper. Remember these are very intricate cuts.

Since learning this wax paper tip myself my cuts don't stick to the die and tear anymore.

Simply peel the wax paper. You can save these and use the wax paper cuts on other projects too.

Now you can assemble your pieces and embellishments.

The end result.

The mounted Prancing Deer head is awesome. Not sure why I wanted to make one but I'm happy with how it turned out.

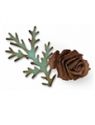
I layered the Holiday Greens and Layered Leaf for some greenery. I cut "Peace" from the Holiday Script Thinlits and used Glossy Accents to make it pop.

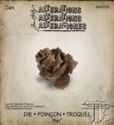
A few Tattered Pinecones and a Jumbo rose too.

Thank you for dropping by. I hope you liked my marbling tutorial. This is an easy and quick way to create a background. I hope you found my tips and tricks useful too!
Have a great Saturday and get inky!
Nicole
 |  |  |  | |
 |  |  |  |  |
 |  |  |  | |
 |  |  |  |
