Saturday, May 31, 2014

Saturday Step by Step - Repurposed Packaging

Hi everyone. Jenny here with this week's edition of the Saturday step by step. On Tuesday Wendy Vecchi shared her ideas for repurposing the packaging that comes with Idea-Ology Remnant Rubs and Industrious Stickers (see her post HERE). It got me thinking, then testing a theory, messing it up a couple of times, then succeeding!! So here's my idea for using up that packaging...


It's so easy to create this seascape as long as you get one with it and don't over-think it. Here's how. Dip your packaging sheet into a mix of rubbing alcohol (surgical spirit) and Cornflower Blue Archival Reinkers. Dry quickly with your heat gun (don't take long with this) and repeat this process until there is a good amount of colour on the sheet. For me it took three goes max.


You should still be able to see the swirls from the packaging. Now to get some bubbles in this 'water'. With a small brush flick some small droplets of rubbing alcohol onto your sheet and watch it react! Too much and it will spread into huge bubbles which are not as effective. Dry quickly again and it's done. Now just cut to the size you need for your card or project.


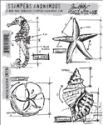
Stamp the seahorse onto a piece of Specialty Stamping Paper with Watering Can Archival Ink.


Colour with Distress Stains using a Tim Holtz Fine Detail brush, then dry, cut out and cover in a couple of coats of clear embossing powder. I edged mine with a Pumice Stone Distress Marker to get rid of those pesky white edges.


Cut some greenery shapes using a couple of the Alterations Strip Dies and Kraft Coredinations card. Remember, you can cut with the front side facing up or down to get the reverse image. Sand back each stem whilst still attached to the card, then remove the waste and shape the leaves with an embossing tool.


To finish your card layer your leaves in a pattern to follow that on the altered packaging sheet. Then add the seahorse - I raised mine using foam pads which also have the edges coloured. Finally stamp a sentiment in Jet Black Archival Ink, and layer your finished sheet on a couple of layers of colour-coordinated card.


Here's a few close ups so you can see how that packaging colour and pattern still shows through to work with the inky bubbles.


Letting the background 'do the talking' by keeping the embellishments simple this way also has the benefit of making this a super quick card to put together.


And of course Wendy always knows what to say and I could have chosen several sentiments to fit lots of occasions.


So that's my take on Wendy's challenge. I hope it has inspired you to look at your packaging in a new light and even have a go at creating your own seascapes. Don't forget our 'Vintage Seaside' challenge runs through Tuesday June 3rd so there's still time to enter.

For now, have a great weekend and take care of yourselves,
Jenny xxx


Friday, May 30, 2014

Friday Focus is changing...

Thank goodness it's Friday!!!!! If you've arrived expecting a new Friday Focus we are excited to announce that there are some changes taking place. Here at Frilly and Funkie we've noticed that some of you have been missing out on the special deals offered at The Funkie Junkie Boutique when the Friday Focus discounts last for just one week. So we figured it was time to do something about that; from this week onwards the Friday Focus deal will last for a full two weeks, giving you more time to grab those bargains!

Last week Cec shared with you her take on the delights of Dylusions sprays giving you not one, but two superb projects to drool over. In case you missed them here's a recap...


To see Cec's original post complete with a full step by step for her journal pages click HERE.

And of course this means you get that extra week to stock up on your Dylusions sprays while they have and extra 15% discount applied over and above the already reduced price!! Head on over to The Funkie Junkie Boutique through Thursday June 5th to grab a bargain.

Have a great weekend everyone!


Wednesday, May 28, 2014

Vintage Seaside Challenge!

Hi! Nancy here again for the second week of our current challenge! With the long, warm days of summer drawing near I have chosen the theme of 'Vintage Seaside.' The mission is to create any type of vintage project that focuses on the sea or beach. The winner will earn a Guest DT spot here at Frilly and Funkie, and everyone who enters will have the chance to win a $25 spending spree at The Funkie Junkie Boutique.

The guidelines for entering are simple: create a new project, link it below and make sure you add a link in your post (not just your blog) back to this challenge. You can combine our challenge with up to 10 challenges (including this one) to be in with a chance of winning. Make sure you follow these rules as unfortunately we have had to eliminate entrants from the prize draws in the past when they have entered too many other challenges. Also, please be sure to turn off your Word Verification so our design team can leave comments on your blogs.

Today we are unveiling the creations from the Funkie side of the Design Team and are thrilled to welcome back our special Guest Designer, Donna Gibson. Donna is a valued former member of the team who continues to create the most fantastic pieces of art. Remember, just click on the blog name to find out more about each one...

Donna Gibson - Guest Designer - From My Art to Yours

Sue Carrington - Stamping Sue Style

Linda Coughlin - The Funkie Junkie

Jenny Marples - Pushing The Right Buttons


********************************************
WEEK ONE

Hi! Nancy here, and once again I have the honor of hosting the challenge! With the long, warm days of summer drawing near I have chosen the theme of 'Vintage Seaside.' The mission is to create any type of vintage project that focuses on the sea or beach. The winner will earn a Guest DT spot here at Frilly and Funkie, and everyone who enters will have the chance to win a $25 spending spree at The Funkie Junkie Boutique.

The guidelines for entering are simple: create a new project, link it below and make sure you add a link in your post (not just your blog) back to this challenge. You can combine our challenge with up to 10 challenges (including this one) to be in with a chance of winning. Make sure you follow these rules as unfortunately we have had to eliminate entrants from the prize draws in the past when they have entered too many other challenges. Also, please be sure to turn off your Word Verification so our design team can leave comments on your blogs. 

Today we are unveiling the creations from the Frilly side of the Design Team; just click on the blog name to find out more about each one...

Cec Wintonyk - CW Card Creations

Rebecca Deeprose ~ Paper Primrose


Now it's up to you! Everyone is invited to join in the fun and share their creations. It's such a delight to see all of your stunning projects! A week from today the Funkie side of the Design Team (alongside another very special Guest Designer) will share their amazing projects, so don't forget to stop by for some more inspiration!

Hugs,
Nancy


Monday, May 26, 2014

Challenge Winners - Words, words, words

Welcome to the Frilly and Funkie challenge blog for the start of a new week, and it's time to announce the winners of the 'Words, words, words' challenge. As ever, thank you so much to everyone who took the time to enter. There were some fantastic entries for this challenge but in the end the Design Team voted for this super journal spread by #11 Susi (froebelsternchen).


We all loved the design and use of colour on this journal spread and it's well worth you taking a look at her blog post to find out more about it. Congratulations Susi on being our favourite for the 'Words, words, words' challenge and winning the opportunity to be a Guest Designer here at Frilly and Funkie for a future challenge.


And Random.org has chosen a winner for our $25 gift certificate to The Funkie Junkie Boutique. Our congratulations this time go to #17 Ruth.

A huge thanks from the Frilly and Funkie team to everyone who took part in this challenge and congratulations again to our winners. Please email Linda at thefunkiejunkie@gmail.com for the codes for the winner's badge and to give us your email address for the Guest Designer details (Susi) and for the gift certificate details (Ruth).

Our current challenge, 'Vintage Seaside', runs through Tuesday, June 3rd. We hope to see you entering this time around so that you too can be in with a chance to win. And remember, you can enter up to 10 challenges including ours, and a maximum of 3 entries per person to our challenge. Please remember to link back to our challenge in your entry and mention in your post that you are entering this Frilly and Funkie challenge.

Have a great week!

Saturday, May 24, 2014

Saturday StepXStep

Hi all, Linda back again this week with another Saturday StepXStep and wishing all  my American friends a happy Memorial Day.  I wanted to so something patriotic for this important holiday so I pulled out my Artistic Outpost Hero set.  I was going to use the soldier image but started looking at the collage stamp with Rosie the Riveter on it and decided to go in a more feminine direction.  While she might not have been an enlisted person, the "Rosies" of the WWII era made an important contribution to the war effort and I thought it would be great to recognize that this Memorial Day.  
I started thinking about how I could bring in some red and white strips to signify our American flag and decided to stay with the feminine feel by making my stripes a flower.  I cut three flowers out of crinoline with my Tattered Florals die and dyed them with Barn Door distress stain.  If I am dying a large batch of crinoline flowers, I usually make up a dye batch with reinkers, but to dye just a couple of flower layers, pulling out the distress stain is quick and easy.    I dried my flower layers with my heat tool.  
The left over ink also got dried with my heat tool so I misted it to rehydrate the ink and then blotted my tag into it.  I dried the first layer and blotted it again.  I ended up doing that three times to create the base layer of my tag.  
I wanted the flag stamp on the tag but was in a frame and had other images and a sentiment that I didn't want, so I masked off those areas with masking tape before I inked up my stamp.  
 The stamp was inked with cobalt archival ink.  
 The tape was peeled off before stamping.
Stars were added using the Tim Holtz Stars Layering Stencil and white Wendy Vecchi embossing paste. I applied the embossing paste with my finger - I find it gives me much better control over where the paste is applied than using a palette knife. 
 I added a bit of bling by applying distress glitter directly to the wet embossing paste.  
Carrying on with the flag look, I cut banners from red kraft core and white card stock.  The HERO was stamped in Cobalt archival, snipped apart and the edges were inked with Vintage  Photo.  I wanted some sort of blue panel to mount my stars on so I cut a Tattered Banner from blue kraft core, sanded and inked it before adhering the stars with Multi Medium Matte.  
To continue with the feminine theme, I gave Rosie a topper cut with the Vintage Lace die and a pretty red crinkle ribbon bow held on with a Gem Clip and topped with another Mirrored Star.  
The tag was finished off with a red and white crinoline flower, topped with a white distress glittered star and a blue star button.  
Thanks for hanging in with me for this StepXStep.  I wish you all a wonderful weekend wherever you are and a happy and safe holiday weekend to my American friends!


These products are available at The Funkie Junkie Boutique, where most name brand products are always 20% below MSRP!