Linda here with a StepXStep to show you how I made my tag for Donna's Spingtime in Paris challenge. But before I get started I wanted to let you know that I decided to leave the Artistic Outpost stamps on
Friday Focus for a second week. They will be 15% off through April 11th. I have some restocks and newly stocked plates coming in on Monday and wanted you all to have a chance to grab them at 15% off too.
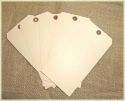
On to the StepXStep...starting with one of the non-branded jumbo tags that I sell in the boutique, I embossed it with the Damask texture fade. I used one of the embossing diffusers to create a non-embossed oval to stamp on.
The texture fade only embosses 2/3rds of the tag, but no worries, I just run it through again to emboss the lower portion. A slight break in the embossing can be seen, but generally by the time I am finished with my layering and embellishing it is barely noticeable.
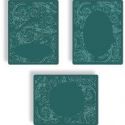
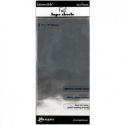
Once embossed, I painted it with Picket Fence distress paint and then spritzed it with Peacock Feathers Distress Stain (in a Mini Mister). I just set the oval embossing diffuser on the tag to mask it so the distress stain didn't cover the oval. The misted distress stain was dried with my heat tool.
I stamped the little flower girl in Coffee Archival ink and then cut a mask for the flower girl as well as created a full mask with an oval cut out. I did this so I could stamp a background around the flower girl.
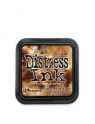
I stamped the background, also in coffee archival, and removed the masks. Happy with the result, I lightly sponged the oval with Vintage Photo DI.
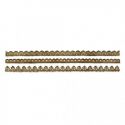
I didn't like the way the oval edge transitioned so decided to edge it with paper lace cut with the Vintage Lace decorative strip die, which I used to cut a strip of foil tape. After laboriously punching the tiny centers out, before removing the backing, I snipped between each repetition of the lace pattern. This was done to allow it to curve around the edge of the oval and still lay flat.
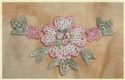
You can see that it didn't quite make it all the way around the oval, but no worries as I covered it up with a hand painted Venise lace appliqué. At this point, I sponged all the edges with Vintage Photo DI.
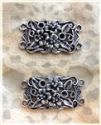
I found a piece of previously dyed seam binding in my stash that matched beautifully. I believe it was dyed with a bit of broken china and a spash of dried marigold distress stains. I embellished it with a pretty floral jewelry connector that is also available at
The Funkie Junkie Boutique.
I was a little short on seam binding so I just cut and glued it rather than wrapping it all the way around the tag.
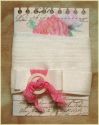
I had an inquiry the other day on how I tie my triple loop bow so I thought I would share that technique. It's super simple. I just wrap it around my fingers three times, slide it off my fingers holding it in the center and then tie another small piece around the middle to hold it in place. See the snippet of seam binding in the upper right corner of the photo below? That's the piece I tied around the middle.
Once tied, clip the tie ends as desired and even out the loops so they are the same size on each side. If it won't even out, untie it and do it again.
These products used to make this tag are available from
The Funkie Junkie Boutique:


Fabulous StepXStep Linda ! Love the lace trim around the edges of the image and the masking is wonderful ! Sue C x
ReplyDeleteWondered how you had got that lacy border around the central image and now I know - patience!!! Love the spritzing Linda. Hugs, Jenny x
ReplyDeleteWhen I first saw your tag I did wonder how you created that gorgeous background and now I know - thank you for sharing this step by step. Love how you put the little border around the frame, it just goes to show that perseverance wins out in the end! Anne x
ReplyDeleteA really gorgeous tag and a wonderful step by step...you are a patient crafter! Hugs trace x
ReplyDeleteI love the ribbon tutorial, I was a wonderer, lol. You make the 'making' look so simple and the tag is so detailed that I can't believe it was that easy. It's gorgeous and I really plan to try this...the edging around the oval is ingenious.
ReplyDeleteThanks so much for sharing Linda! Gorgeous techniques.
ReplyDeleteStunning make Linda. So gorgeously feminine...love that embossing folder. TFS
ReplyDeleteAnnie x
Stunning tag and technique.
ReplyDeleteLinda, your tag is beautiful and the tutorial is delightful!! I loved it!
ReplyDeleteSuch a delicious tag, Linda - and the step by step is so full of great tips and treats! Using the diffuser as a mask - of course, why didn't I think of that... The triple-tied bow - simply gorgeous... The snipped paper lace to use it on a curve - fantastic. Thank you so much for sharing your wonderful process!
ReplyDeleteAlison xx