
Welcome to another Saturday Step X Step here at Frilly and Funkie, hosted today by Buttons (that's me!) I'm sticking with the upcyling theme from our current challenge as today is Earth Day.

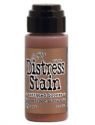
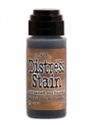
For our previous challenge I created some flowers with an interesting component - has anyone guessed yet? All will be revealed... but to start with cover some white card in a mix of Spiced Marmalade and Victorian Velvet Distress Paint and Antiqued Bronze Distress Stain. If you dab all three onto your craft mat and spritz with water you can smoosh your card into the mixture several times until it is covered, drying after each layer. It is also important to colour the reverse side with paint (I chose to stick to Victorian Velvet).


To add further depth and ensure there are no white edges sponge Victorian Velvet Distress Ink onto the outside of each flower - no need to be accurate again here as the ink blends into the paint as it dries.

It is important to stick the flowers together at this stage, and then roll each petal around a thin paint brush, pencil or similar to add some dimension. Having said that they should remain squashy enough to be added to cards and still fit inside an envelope if stuck on a card!

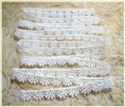
And now for the big reveal... yes, I've used the plastic net which held the mini Easter eggs for the 'egg cups'! You will find this sort of net is used to contain all sorts of things including confectionery, fruit and vegetables, and also comes in lots of different colours. If you don't already have a hole in the middle of your flowers punch one out and then thread your net through from back to front. When you've got enough to create realistic looking stamens (be generous) cut off at the back, leaving enough to be stuck to the reverse of the flower with strong tape. If you want your stamens to look a little 'frazzled' heat them very gently with your heat gun for a couple of seconds - don't overdo it as they may frizzle away completely!

So now you have flowers to add to all sorts of projects. You've already seen my 'April in Paris' card and now here's another little ATC container (which also upcycles old book pages from a charity shop).


To further embellish the flowers I added a touch of gilding wax here. If you want to see some close ups pop over to my blog HERE. Meantime there's a list of 'ingredients' at the end of this post. All that remains is for me to wish you a fabulous weekend. Hugs, Jenny xxx
 |  |  |  |  |
 |  |  |  |  |
 |  |

Jenny these are such beautiful flowers, lovethe blended colours and gorgeous shape and what a clever upcycled use of the net bag. The finished piece on your blog is yummy. A really fact step by step Jenny , hugs trace x
ReplyDeleteThat is very cool Jenny!
ReplyDeleteWhat a great step by step... netting is so craftable, isn't it?! - and your use of it for stamens is so clever, Jenny; it looks wonderful. And those little ATC containers are completely fabulous!
ReplyDeleteAlison x
This is fabulous Jenny, what a great little ATC box, love the idea of using the net for the centre of the flowers. xx
ReplyDeleteBrilliant idea, Jenny,
ReplyDeleteLucy x
Clever, clever, clever! Super cute flowers and such a cool way to use the netting! Terrific StepXStep, Jenny!
ReplyDeleteFabulous StepXStep Jenny ! Love the flowers and the netting is awesome ! Sue C
ReplyDeleteGreat StepXStep.
ReplyDeletelove the flowers.
Greetings Janny
Love these flowers and what a fabulous StepXStep! I save all the produce netting, but don't have any yellow! Oh no! Enjoy the weekend!
ReplyDeleteBrilliant project and thanks for sharing the details - especially like the tip for using up those plastic nets - genius!!
ReplyDeleteGreat step by step Jenny and a great tip using the net as Stamens. Genius!!!!!
ReplyDeleteHave a fab weekend
Hugs Annie x
Hi Jenny
ReplyDeleteThank you for sharing the how to with the flowers they really are sweet and I love your little ATC bag so pretty
Ria
Jenny - hee-hee - I love your idea about using the netting from vegetable bags!!!! I've actually saved a few of them as I saw a video using them but now I can't find the video - ha-ha!!
ReplyDeleteAnother really beautiful project - many thanks for sharing!!
Lorraine - Ontario, Canada
;o)
Totally fabulous idea to use one of those net bags in that way!! I'm well impressed :D
ReplyDeleteI use these net bags for all sorts of things, but never thought of using them as stamens. So brilliant. The whole project is gorgeous. Thanks so much for the wonderful step by step!
ReplyDeleteA really excellent step by step Jenny, I would never have guessed the centres were made from net bags - wow, what a great idea. Love the idea of heating and frazzling them too. I really love the little bags for the ATCs too. Hugs, Anne x
ReplyDeleteSuch sweet little flowers and your ATC baskets are so pretty.
ReplyDeleteWishes
Lynne
A brilliant tutorial, Jenny, loving the flowers and fantastic using the plastic netting for the stamens, brilliant.
ReplyDeleteLots of love from Patricia xx
great tutorial and a fabulous project.Brilliant idea for the flower centres. Definitely going to try this. Thanks Jenny xx
ReplyDeleteGreat tutorial and a very beautiful little bag
ReplyDeleteThank you
Love Chrissie xx
Stunning Jenny! A great tutorial and I adore the flowers and of course the finished project, brilliant!!
ReplyDelete